Apple Introduces the Definitive Reading Glasses App
People with nearsightedness or presbyopia often use their iPhones or iPads to take pictures of objects that are difficult to see with the naked eye and magnify them. I am no exception.
However, if you use a regular camera app, useless images are saved in the camera roll.
With the reading glasses app, the camera image on the screen stills when the shutter is pressed, but it is not saved to the camera roll. You can temporarily stop (freeze) the image captured by the camera.
I have used many different reading glasses apps.
They all have their advantages and disadvantages, but I think the "Magnifier" app, which recently became a standard feature of iOS, is the definitive reading glasses app.
It is a "follow-up" application that incorporates the best parts of various applications, so it has all the features you want in reading glasses.
- Tap the screen to freeze (shoot) (Basic.)
- Freeze (shoot) but do not save to camera roll (Basic.)
- Zoom before or after freeze (shoot) (most apps do one or the other).
- Contrast adjustment and black/white inversion of the image (before or after taking a picture at any time).
- Continuous shooting is available. You can take several pictures and observe them at a later time. (The images are not saved in the camera roll).
- The controller position can be moved on the iPad.
Furthermore, it can be immediately activated from the Control Center. I have nothing more to complain about.
I am using it immediately and I like it very much.
Translated with www.DeepL.com/Translator (free version)
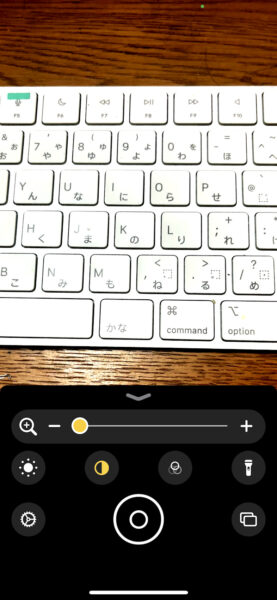
I can't press the shutter if both hands are full.
I used a magnifier app to read a paper book. It has been a long time since I read a paper book.
These days it's all about e-books and audiobooks, but there are still many books that are only published on paper. I also like to borrow out-of-print books from the library.
The enlargement and quality adjustment features of this app make reading paper books so much easier. There is one problem, however.
If I put my iPad on the stand and try to take a picture with the book spread out with my hand, both hands are occupied and I cannot press the shutter.
Conversely, if I unfold the book with one hand, I can't hold it properly.
This was originally a problem when using the scanning app, but now that we have a nice magnifier app, it's time to do something about it.
Use relay touchboards to make the screen tap.
So I decided to create a device to tap the iPad screen without using my hands.
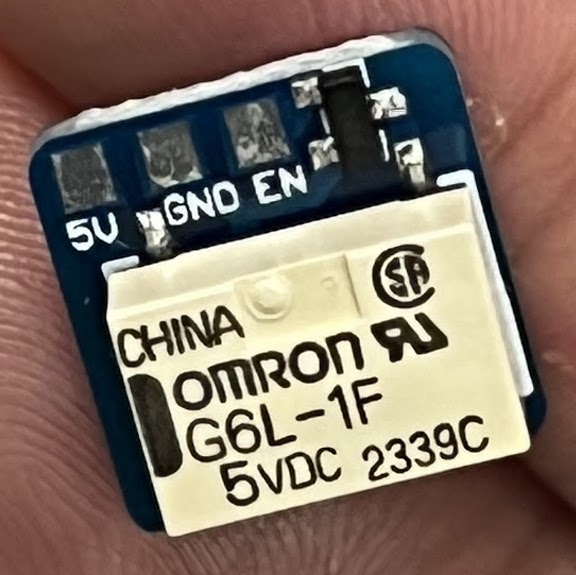
The star of the show is a device called "Relay Touch Board". I bought it at "Switch Science" Store. This is the "with driver" version.
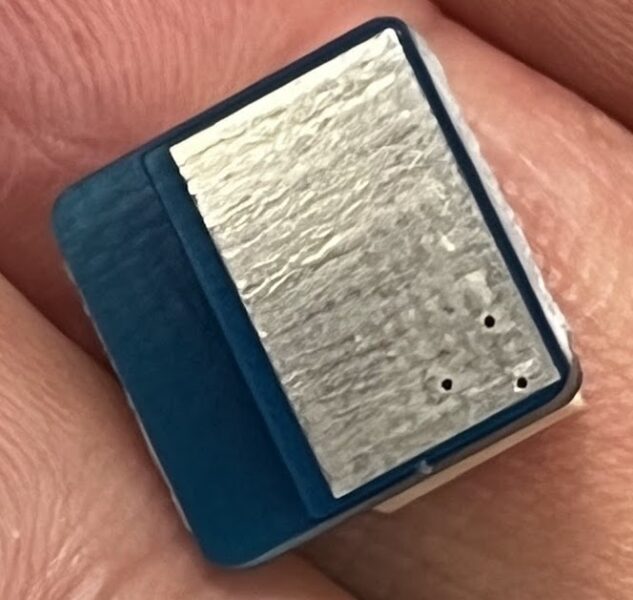
Relay touch boards are used by placing the electrodes on the surface against a touch panel.
It has a power supply and a control terminal. When the control terminal is activated (5 V), a relay is activated, producing the same effect as a finger tap on the screen.
This allows the screen tap to be controlled from a microcontroller or electronic circuit. You can also have it press the shutter button of the magnifier application .
This time, I made it using only electronic circuits without using a microcontroller.
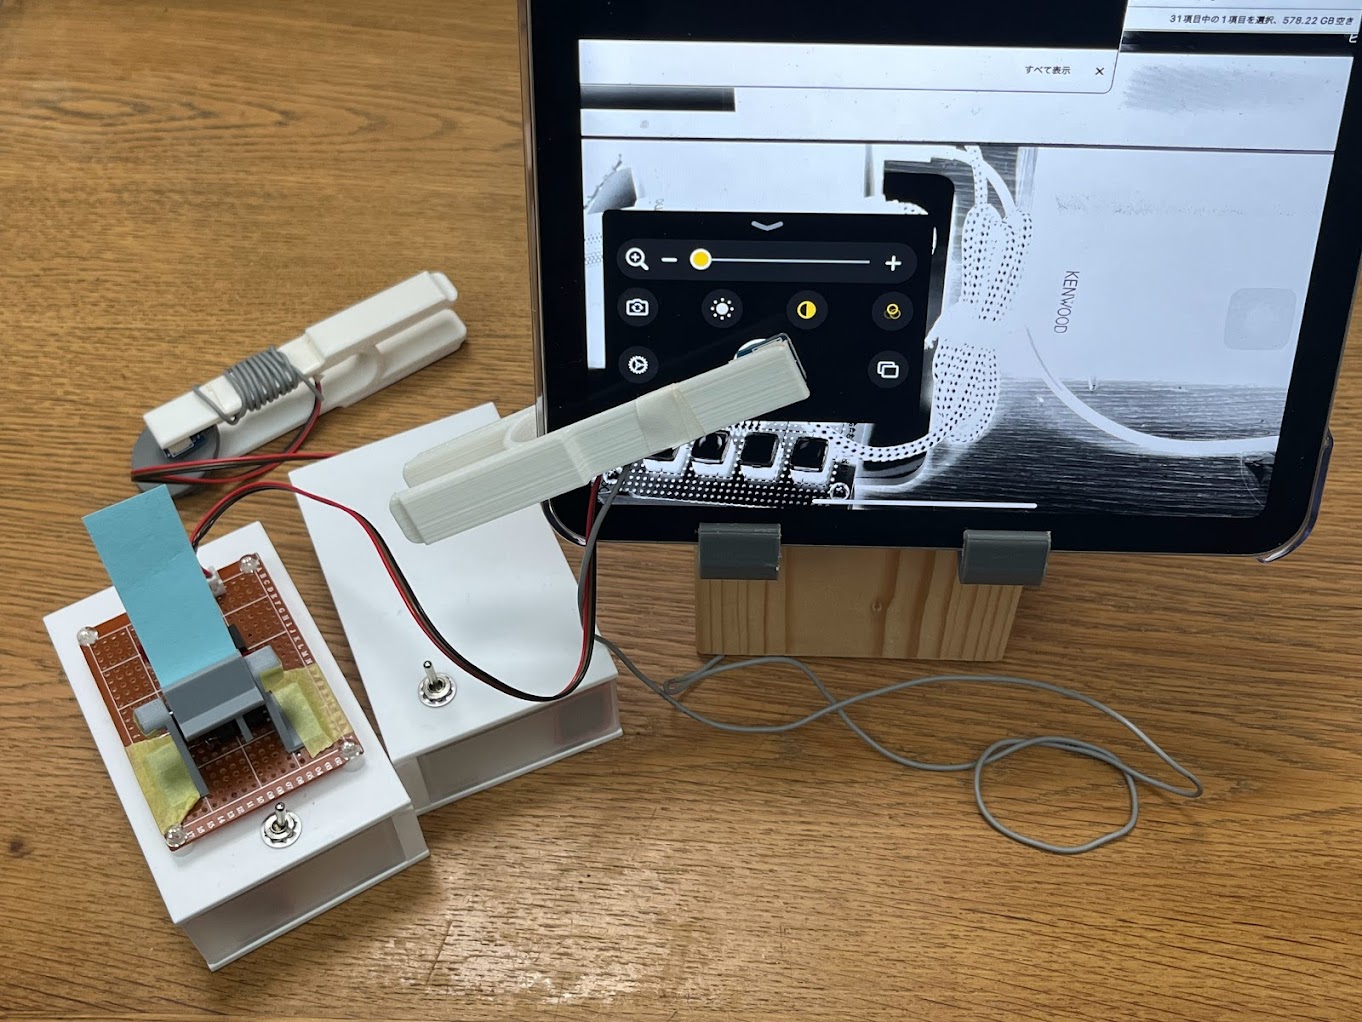
3D printed clip to attach relay touchboard to iPad
In this craft project, I focused on making it easy to take out the board when needed and easy to put it away when finished using it.
Relay touchboards can be attached with tape, but that does not make it easy to take them out or put them away.
So we decided to make a clip that looks like a clothespin.
The clip in the photo was made with a 3D printer. It was printed in ABS because it needs to be appropriately hard and flexible.
The backside of the retainer swings freely according to the slope of the back, so the electrodes of the relay touch board adhere well to the screen.
The surface of the hold-down is covered with a non-slip sheet.
The relay touch board was fixed with double-sided tape.
I first tried to make a voice-switch type.
The first one I made to achieve hands-free operation is the voice-switch type.
When you want to take a picture, you make a sound by speaking out or other means, which activates the relay touch board and presses the application shutter.
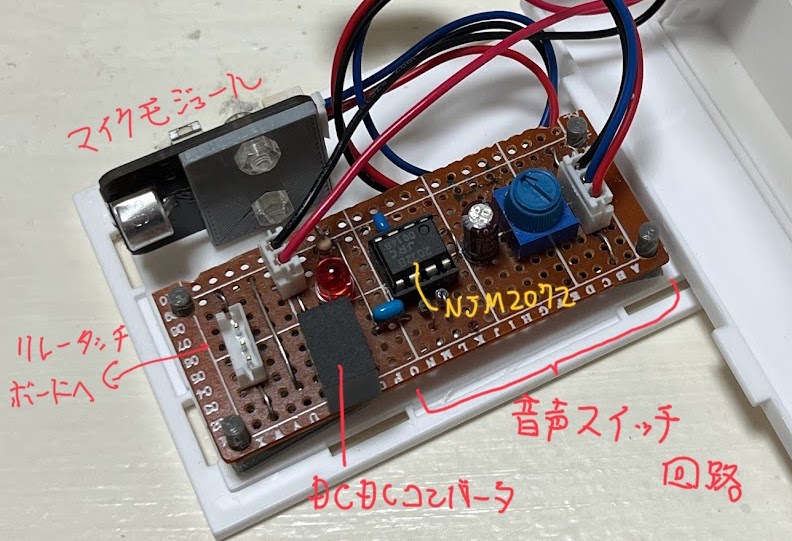
Audio is picked up by a commercially available condenser microphone unit.
The audio signal picked up by the microphone is processed by a level detection IC called NJM2072. This IC is often used in voice switches, and its output is turned on when the sound level exceeds a certain level.
The sensitivity is adjusted by the volume between the microphone unit and the voice switch.
The output of the NJM2072 is sent to the relay touch board to tap the screen.
The NJM2072 has already been discontinued and seems to be almost impossible to find on the market. I kept some in stock when I used it in the past.
So I omit the circuit diagram. It is the same as the sample circuit in the datasheet, just changing the capacitor values a bit to adjust the operating time.
The power supply is a 9-volt battery converted to 5 V with a DC-DC converter.
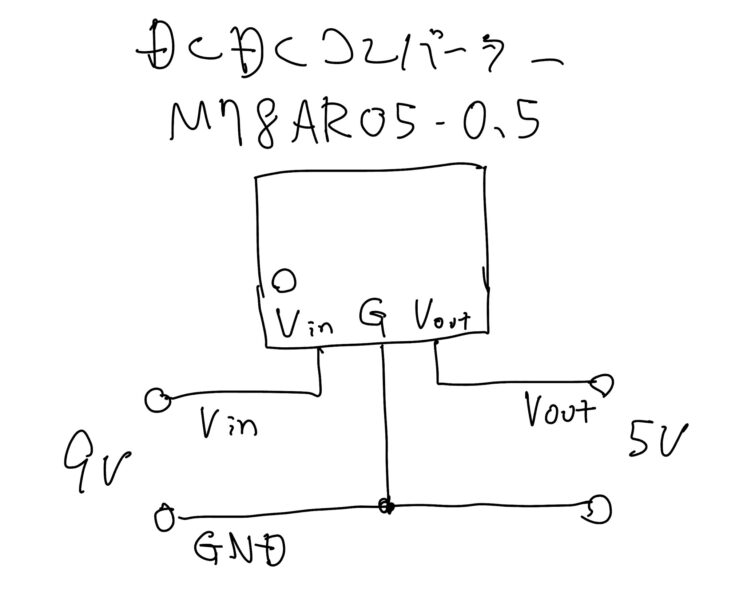
The DC-DC converter used is a product called "M78AR05-0.5". It is compact and convenient to operate without external components.
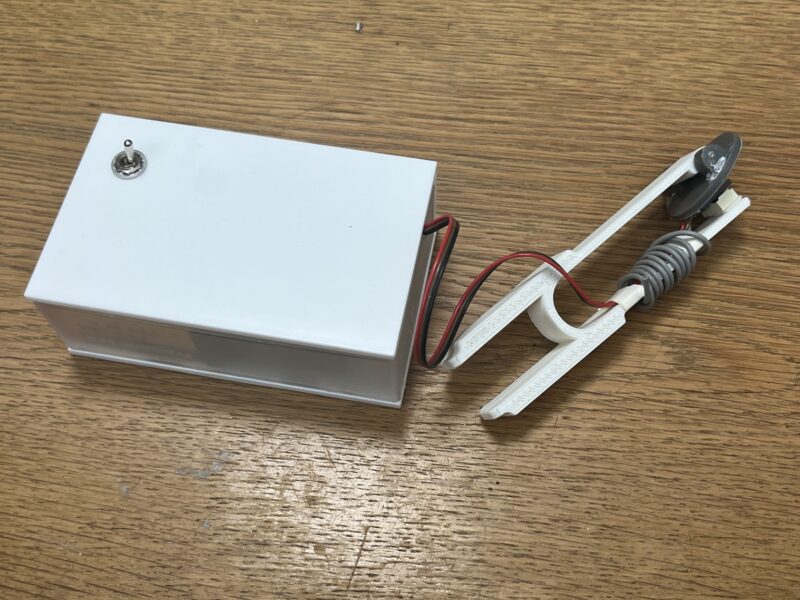
When completed, it looks like this.
Sometimes the microphone picks up the shutter sound and goes into an endless loop.
The voice switch type worked properly. The response was good, and overall it was not too bad.
However, since the magnifier application makes a shutter sound, depending on the position of the microphone and speaker, the microphone may pick up the shutter sound immediately after the picture is taken, and the picture is immediately reshot, and the microphone picks up that shutter sound and shot again, which can cause the picture to enter a feedback-like loop.
Unfortunately, it seems that this shutter sound cannot be turned off. In Japan, the shutter sound cannot be turned off even with regular camera apps, so this seems to be the same specification. I wonder if it doesn't work on iPads designed for overseas.
Also, not being able to make unnecessary noises puts a strange pressure on the user, and it is tiring.
I suppose there are many ways to do this if you use a microcontroller, but this time I used only electronic circuits.
So I decided to try another idea.
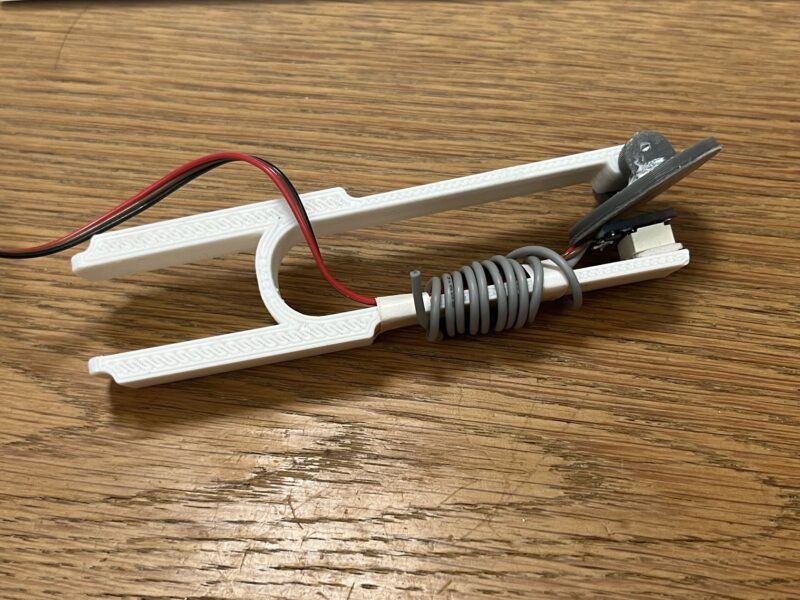
I also made a breath switch version.
Another idea I had was to make a breath switch version.
When the user blows on the seesaw-like object, the seesaw moves, the switch turns on, and the shutter is pressed.
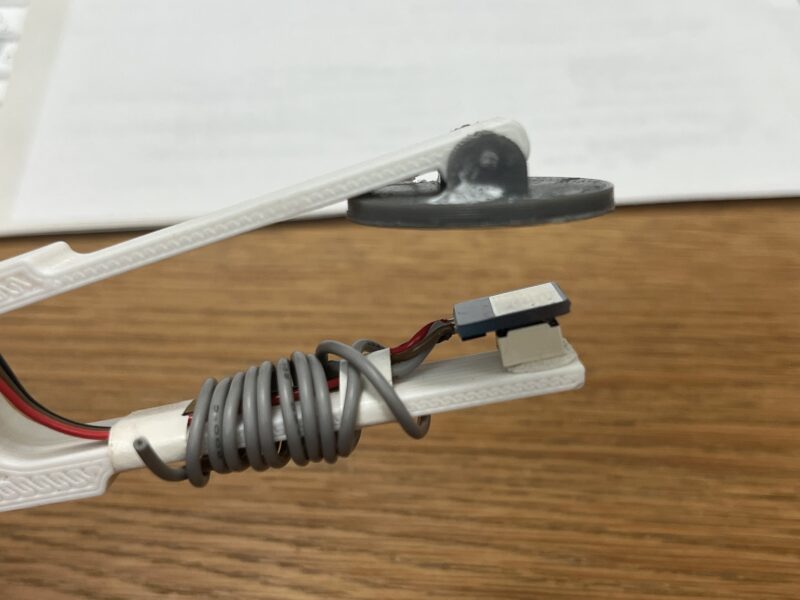
A mechanical switch requires a strong force, so I used a photo interrupter for the switch. This is OMRON's EE-SX398.
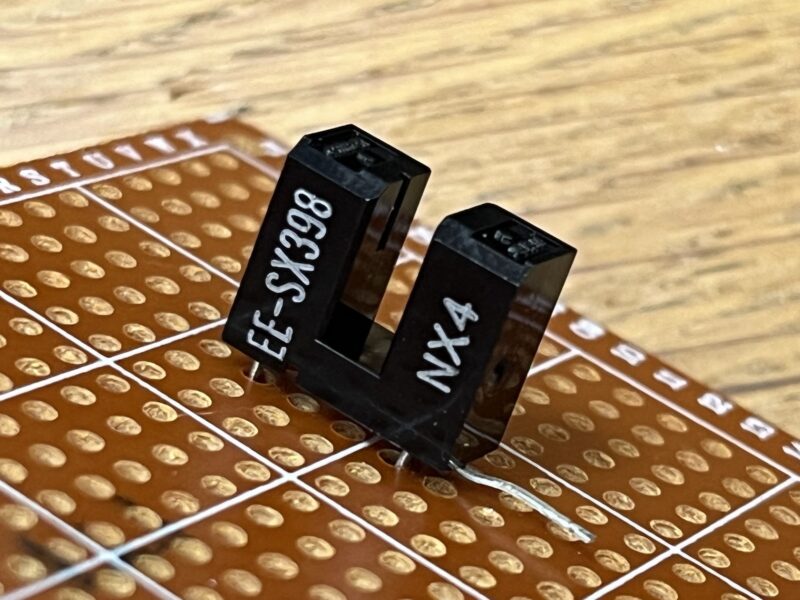
There are two types of these photointerrupters with the same specifications: the E0E-SX398 turns ON when light is interrupted, and the EE-SX498 turns ON when light enters.
The part that receives breath and moves like a seesaw was made with a 3D printer. To reduce weight, the part of the sail (?) that catches the breath is made of paper (Post-it).
The circuit is as shown in the figure. The output of the photo interrupter is just connected to the relay touch board.
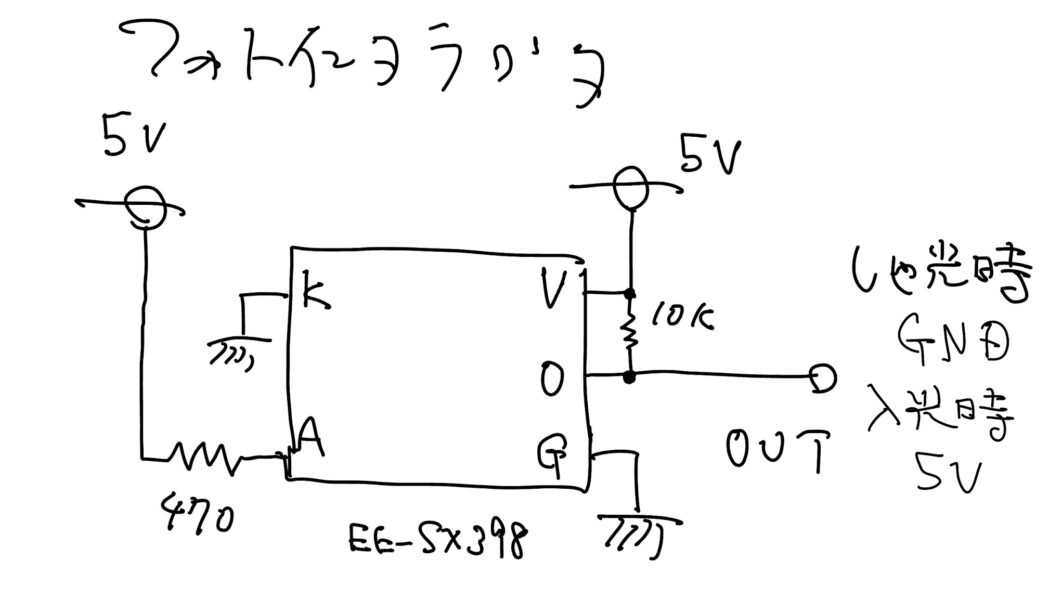
When the photointerrupter is blocked and turned ON, the output falls to GND and the relay touch board becomes inactive.
When the photointerrupter enters the light and turns OFF, the output goes to 5V and the relay touch board becomes active.
The breath switch type worked quite well.
If the size of the post-it as a sail is appropriate, it will work with a fairly light breath.
However, if you take your eyes off the screen to aim your breath, the book may shift position. This is something you will have to get used to.
I feel that if I attach an air hose to it and hold it in my mouth, my work efficiency will increase, but I feel that I don't need to go that far.
At any rate, I think we achieved our initial goal. It was also interesting to be able to do this without using a microcontroller.
While using it, I noticed that it also has a kind of barrier-free interface. It's like using an iPad without using your hands.
Mystery of poor response when battery powered.
One thing happened during the production process that I did not understand.
The relay touch board tapping on the screen, which worked perfectly in the prototype circuit, did not respond in the actual production.
The relay sound was heard, so the relay touch board itself seemed to be working, but the iPad side did not respond. This happens when the iPad is operated continuously.
One difference from the prototype is the power supply. The prototype was powered by an AC adapter, while the production version is battery-powered.
According to what I have heard, the touch panel captures changes in capacitance. I wondered if the battery power might prevent the touch panel from quickly losing electric charge during continuous operation.
When I touch the GND of the circuit with my finger as a test, there is no problem with continuous operation.
I tried covering the inside of the case with a metal plate and connecting the ground to it, but this had no effect.
I did various things and tried pulling the GND lead outward about 20 cm, which solved the problem.
Finally, I used the lead connected to GND on the relay touch board and wrapped it around a clip.
The mysterious curly wire attached to the clip is that.
I don't know the exact reason for this, but it works for now, so I'm happy with the result.
After all, when you make something realistic, all kinds of things happen.