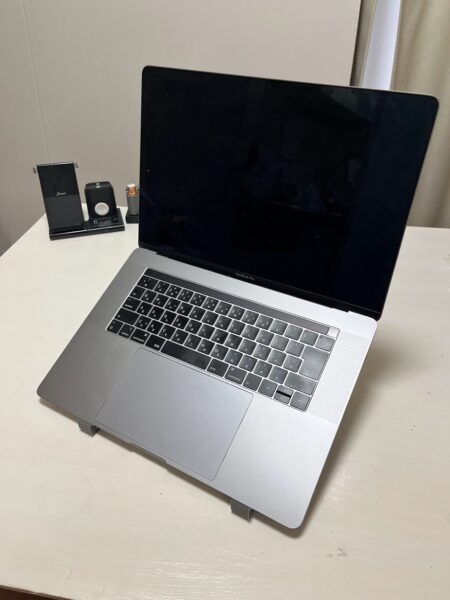
Raise your eyes to improve back pain.
I have some kind of back pain and it is not getting better.
The main cause of my back pain is my bad posture.
I have always had a hunched back, and when I use a computer, I tend to curl my back.
Crossing my legs has also become a habit.
I decided to raise the height of the display I usually use.
For many years, I had thought that a lower display height would be easier to use, but habits can change if you want to.
Now I have become accustomed to a slightly higher display height.
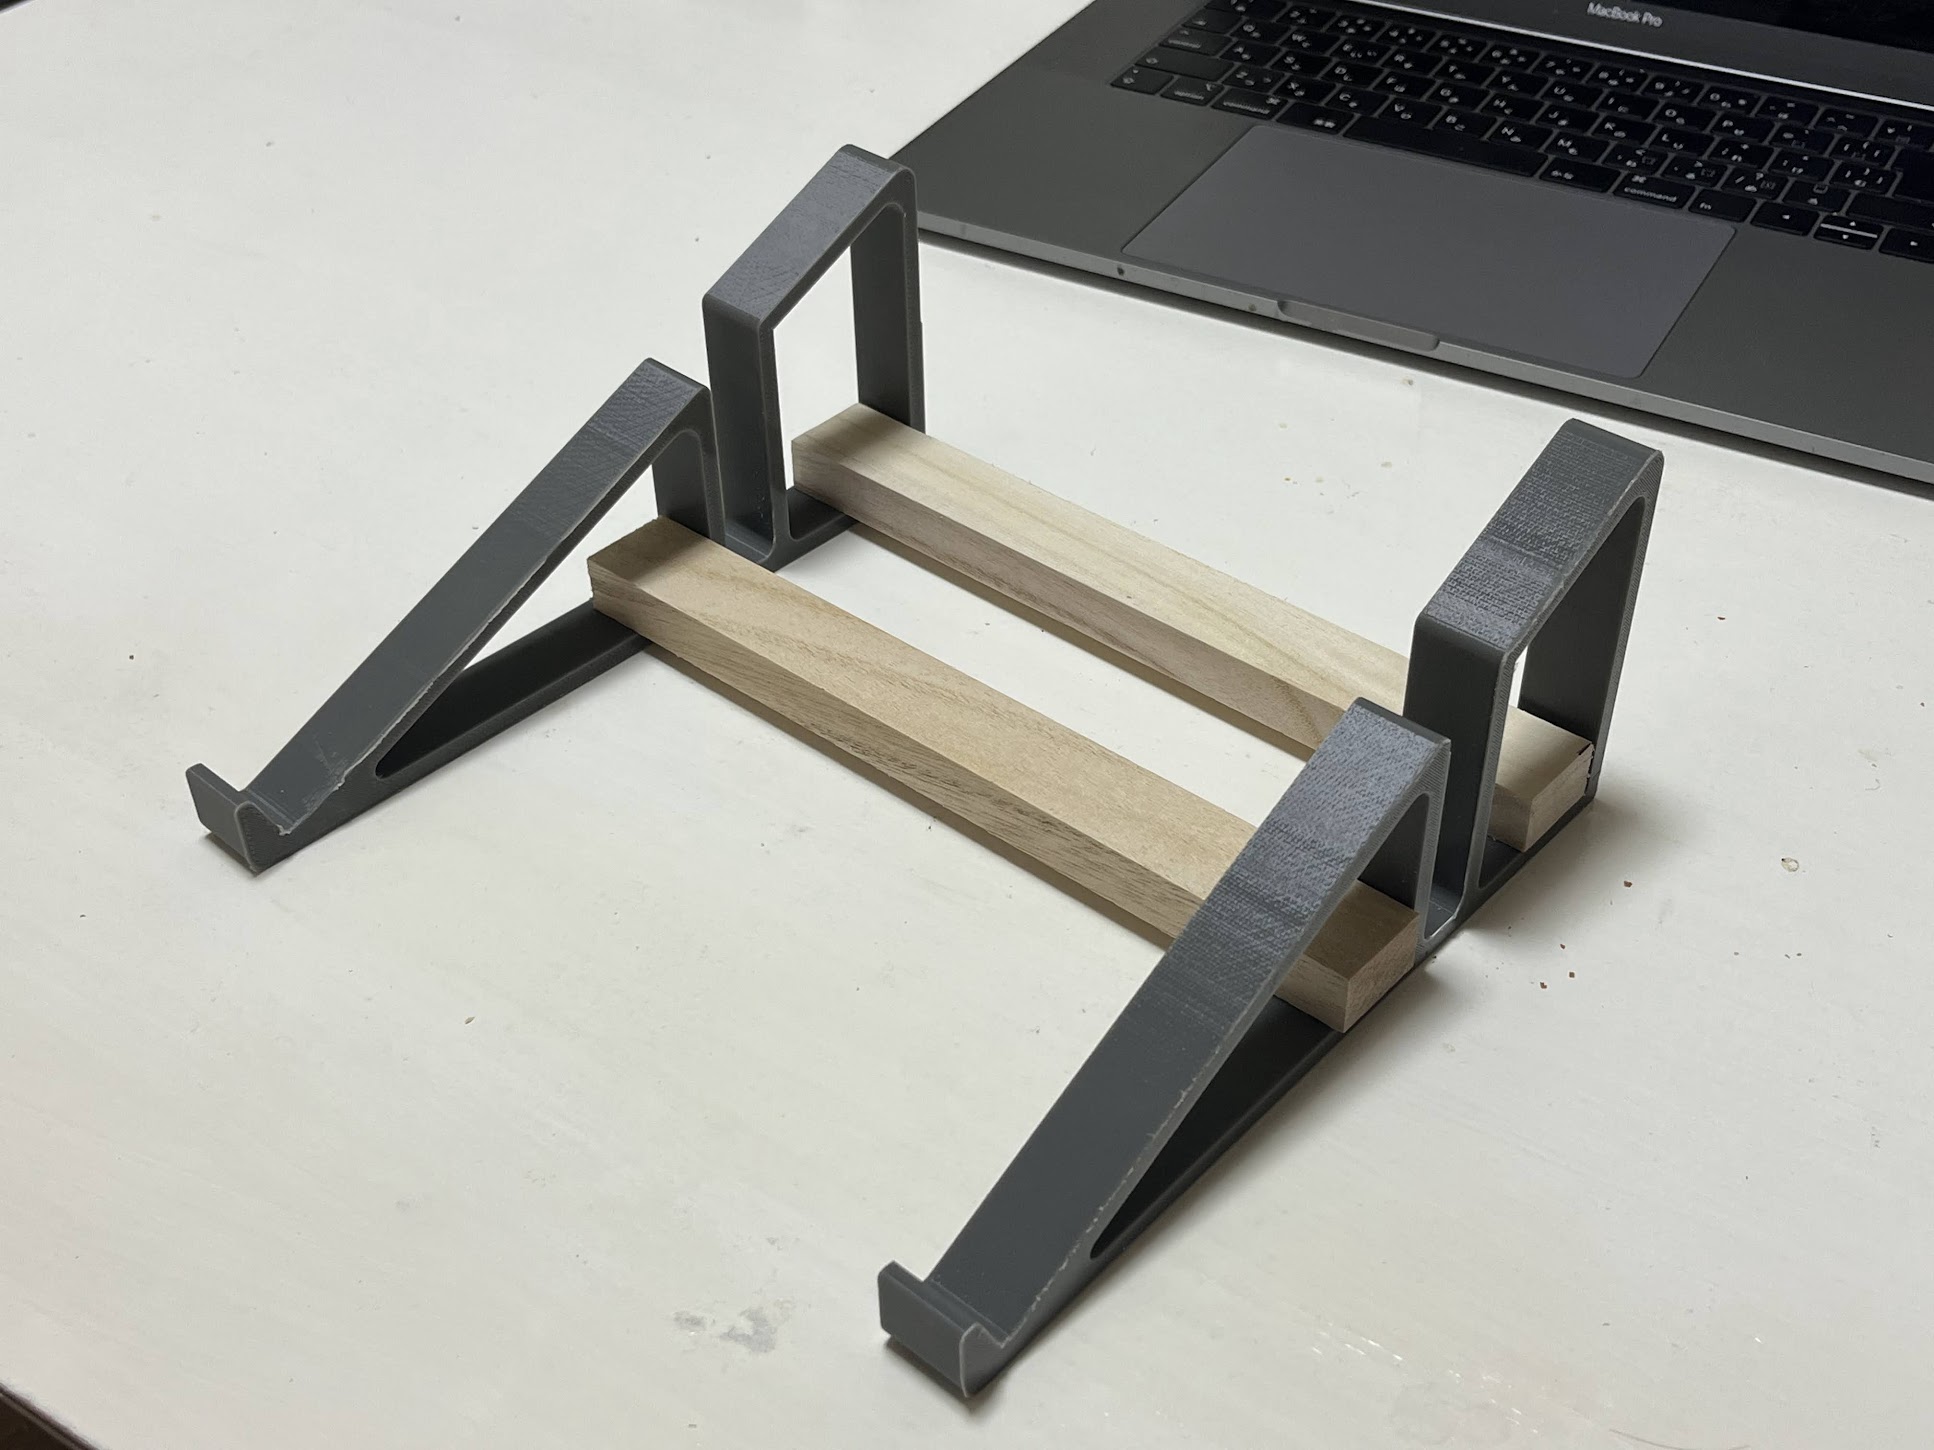
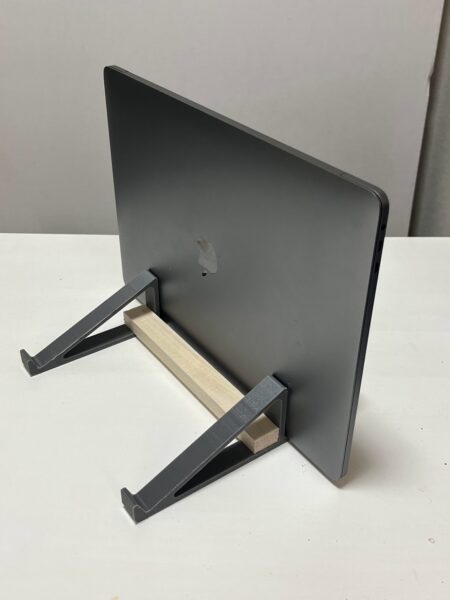
2-way design that also allows MacBooks to be stored upright.
I had previously made a stand for MacBooks, so I modified the data to make this stand.
In addition to readjusting the angle and size, a vertical slit has been added to allow a closed MacBook Pro to stand up.
I usually have quite a bit of trouble finding a place to put my PC when I want to clean up the table top, but this will do the trick.
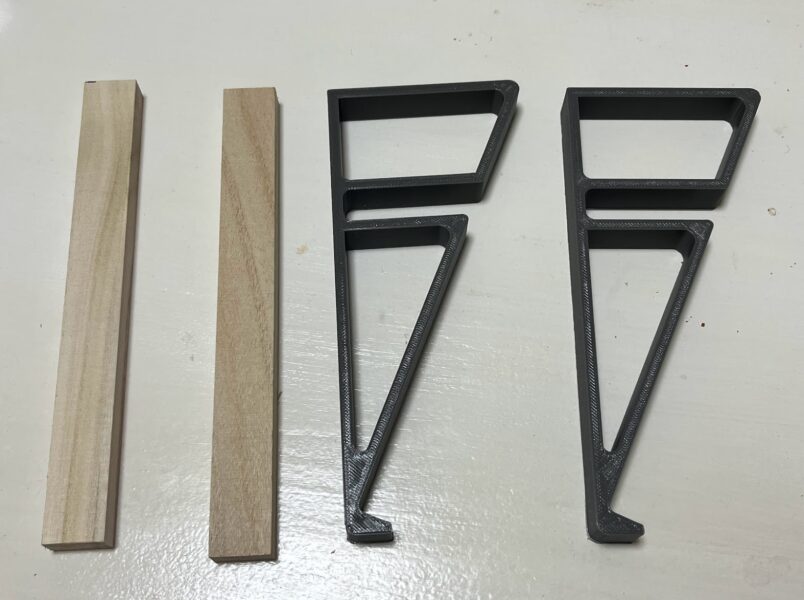
The data looks like this.
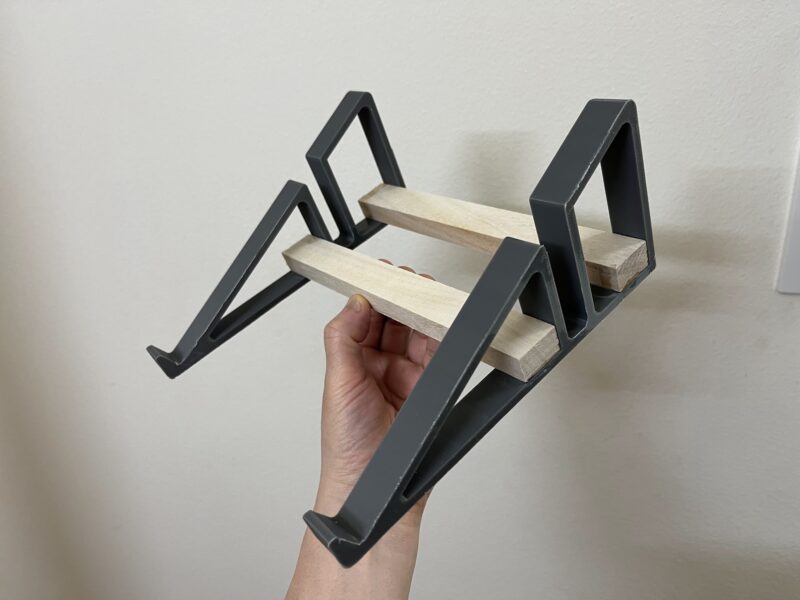
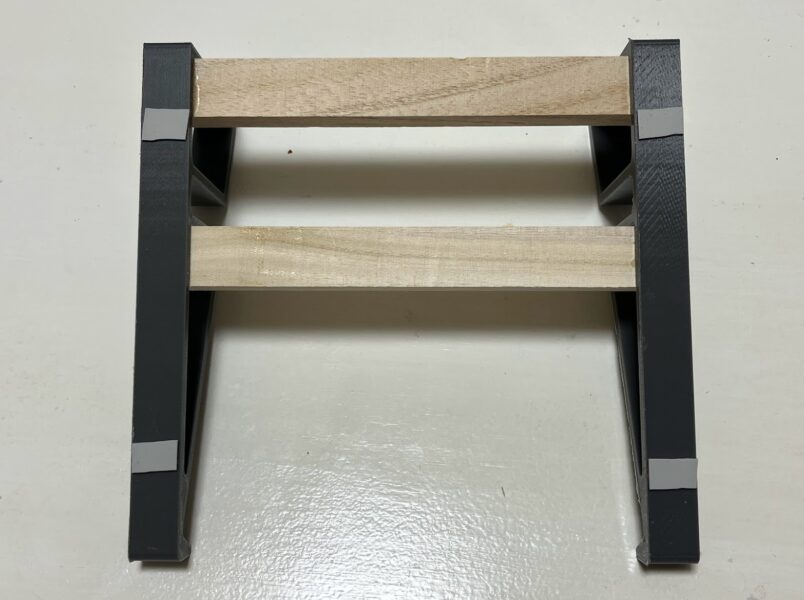
3D printed in left and right pairs and connected with cheap wood
The part that holds the MacBook Pro was output in two pieces using a 3D printer.
The two parts are connected with sticks or boards at appropriate intervals. If I had used a 3D printer to make all the parts, the output time would have been very long.
This time, I used cheap wood that I had left over at hand and attached it with instant adhesives.
Know-how on how to apply non-slip silicone sheets
A non-slip silicon sheet is attached to the back side.
If the silicone sheet is placed slightly away from the edge of the stand, it will be easier to move the stand.
If the sheet is affixed away from the edge, it can be easily moved by simply lifting one side slightly to create a gap between the sheet and the table, as shown in the photo.
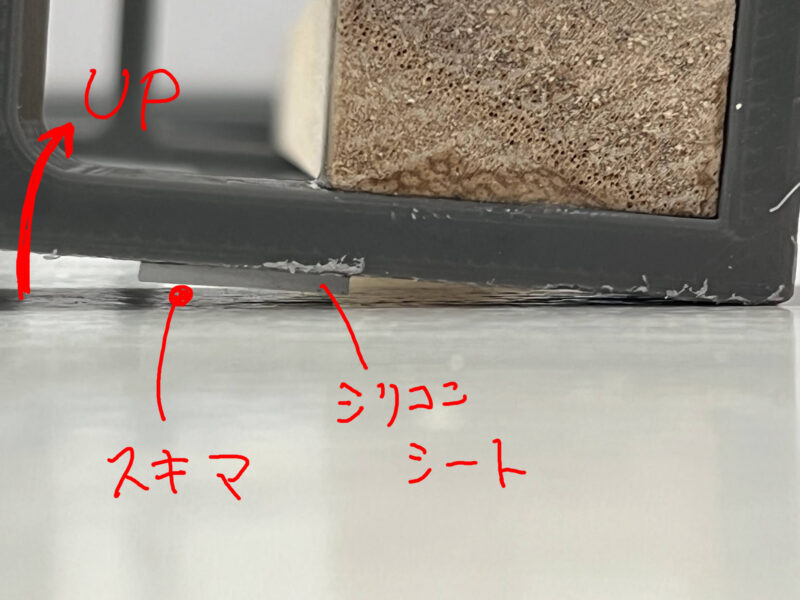
If you put silicone sheets on the edge or the entire surface of the stand, you have to lift the whole thing every time you move it, which is quite inconvenient.
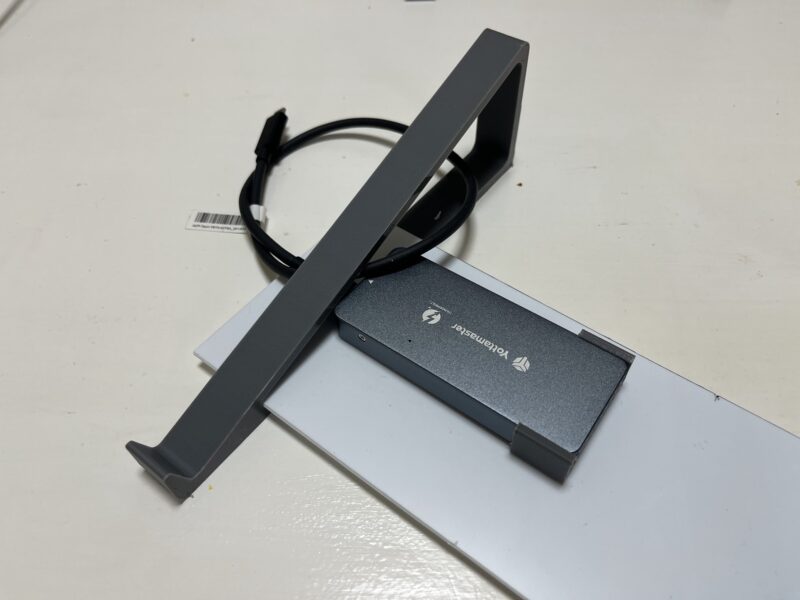
The stand I made before is like this, with an SSD built in. In addition to being able to freely set the angle and size of the stand, the ability to customize it like this is one of the charms of a self-made stand.